所属分类:web前端开发
之前的文章《手把手教你怎么使用CSS3实现动画效果(代码分享)》中,给大家介绍一下怎么使用css3动画效果设置经验。下面本篇文章给大家介绍怎么使用css3给图片添加渐变效果,伙伴们来看看一下。

前端(vue)入门到精通课程:进入学习
Apipost = Postman + Swagger + Mock + Jmeter 超好用的API调试工具:点击使用
初次接触css3渐变是在很早以前了,觉得这个东西很有意思哈,跟玩 PS 似的,可以做出很多华丽的东西。
| IE | FF | Chrome | Safari | Opera | iOS | Android | Android Chrome |
|---|---|---|---|---|---|---|---|
| 6-9(no) | 2-3.5(no) | 4-9(部分-webkit-) | 3.1-3.2(no) | - | 3.2-4.3(部分) | 2.1-3.0(-webkit-) | 10-25(-webkit-) |
| 10+ | 3.6-15(-webkit-) | 10-25(-webkit-) | 4-5(部分)5-6.1(-webkit-) | - | 5+ | 4-4.3(-webkit-) | 26+ |
| - | 15+ | 25+ | 5-6 | 15+ | - | 4.4+ | - |
使用语法
linear-gradient([ [ [| to [top | bottom] || [left | right] ],]?[,]+);
登录后复制以下代码都可以运行,执行的结果一样
linear-gradient(#fff, #333);
linear-gradient(to bottom, #fff, #333);
linear-gradient(to top, #333, #fff);
linear-gradient(180deg, #fff, #333);
linear-gradient(to bottom, #fff 0%, #333 100%);
登录后复制可以定义角度,起始方向,颜色,以及颜色占比
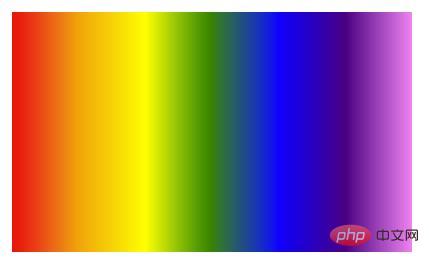
demo
<div style="width: 200px; height: 200px;"></div>
<style>
  div {
    background: linear-gradient(
      to right,
      red,
      orange,
      yellow,
      green,
      blue,
      indigo,
      violet
    );
  }
</style>登录后复制
用法和 linear-gradient 差不多,其实就是渐变的一个填充。可以精确到像素,比如实现一个斑马纹
<div class="g"></div>
<style>
  .g {
    background: repeating-linear-gradient(
      -45deg,
      transprent,
      transprent 25px,
      #fff 25px,
      #fff50px
    );
  }
</style>登录后复制
使用语法
radial-gradient( [ circle ||][ at]? , | [ ellipse || [|]{2}][ at]? , | [ [ circle | ellipse ] ||][ at]? , | at,[ ,]+ )登录后复制以下代码执行结果一样
radial-gradient(circle, #f00, #ff0, #080);
radial-gradient(circle at center, #f00, #ff0, #080);
radial-gradient(circle at 50%, #f00, #ff0, #080);
radial-gradient(circle farthest-corner, #f00, #ff0, #080);
登录后复制可以通过 length 来快速定位形状的位置closest-side 渐变的边缘形状与容器距离渐变中心点最近的一边相切(圆形)或者至少与距离渐变中心点最近的垂直和水平边相切(椭圆)。
closest-corner 渐变的边缘形状与容器距离渐变中心点最近的一个角相交。
farthest-side 与 closest-side 相反,边缘形状与容器距离渐变中心点最远的一边相切(或最远的垂直和水平边)。
farthest-corner 渐变的边缘形状与容器距离渐变中心点最远的一个角相交。
可以通过 at 来快速制定圆心的位置circle at left top圆心在左上角
circle at right top圆心在右上角
circle at left bottom 圆心在左下角
circle at right bottom 圆心在右下角
circle at center | at 50% 圆心在正中间
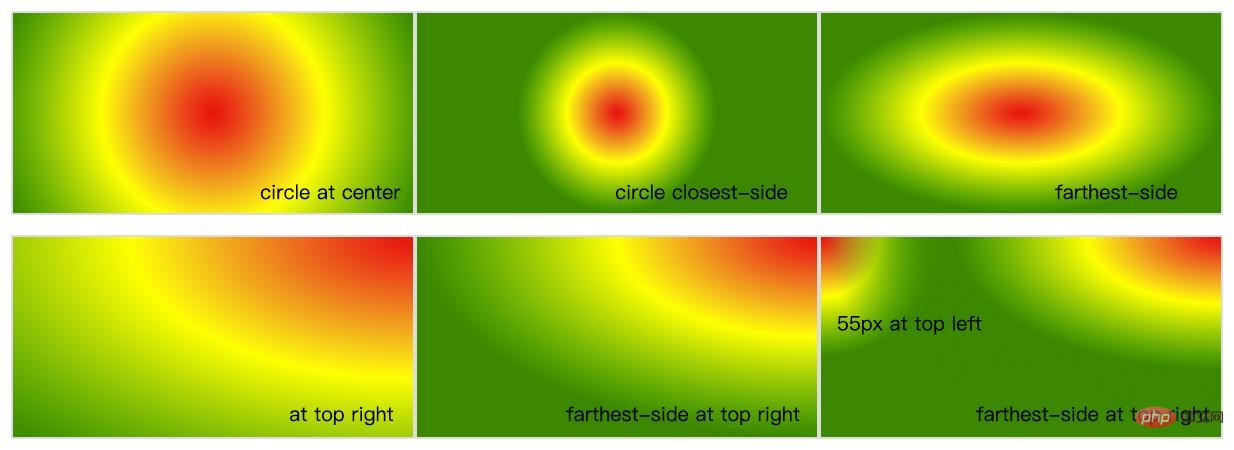
代码示例
<style>
  div {
    width: 200px;
    height: 100px;
    margin-top: 10px;
    border: 1px solid #ddd;
  }
  .g1 {
    background: radial-gradient(circle at center, #f00, #ff0, #080);
  }
  .g2 {
    background: radial-gradient(circle closest-side, #f00, #ff0, #080);
  }
  .g3 {
    background: radial-gradient(farthest-side, #f00 20%, #ff0 50%, #080 80%);
  }
  .g4 {
    background: radial-gradient(at top right, #f00, #ff0, #080);
  }
  .g5 {
    background: radial-gradient(farthest-side at top right, #f00, #ff0, #080);
  }
  .g6 {
    background: radial-gradient(
        farthest-side at top right,
        #f00,
        #ff0,
        #080,
        transparent
      ), radial-gradient(60px at top left, #f00, #ff0, #080);
  }
</style>
<div class="g1"></div>
<div class="g2"></div>
<div class="g3"></div>
<div class="g4"></div>
<div class="g5"></div>
<div class="g6"></div>登录后复制
得到如下

这个和 repeating-linear-gradient 使用差不多,就是对渐变的填充。
代码示例
<style>
  div {
    width: 200px;
    height: 100px;
    border: 1px solid #ddd;
    float: left;
    margin: 10px;
  }
  .g1 {
    background: repeating-radial-gradient(circle, #f00 0, #ff0 10%, #f00 15%);
  }
  .g2 {
    background: repeating-radial-gradient(
      at top left,
      #f00,
      #ff0 10%,
      #080 15%,
      #ff0 20%,
      #f00 25%
    );
  }
  .g3 {
    background: repeating-radial-gradient(
      circle closest-corner at 20px 50px,
      #f00,
      #ff0 10%,
      #080 20%,
      #ff0 30%,
      #f00 40%
    );
  }
</style>

<div class="g1"></div>
<div class="g2"></div>
<div class="g3"></div>登录后复制
得到如下

利用渐变可以做出很多效果
代码示例
<style>
  @keyframes up {
    0% {
      top: 100%;
    }
    100% {
      top: -100px;
    }
  }
  .blister {
    position: absolute;
    width: 80px;
    height: 80px;
    display: block;
    border-radius: 50%;
    // left: 300px;
    overflow: hidden;
    animation: up 20s linear infinite;
    bottom: -100%;
    background: rgba(255, 255, 255, 0.1);
    cursor: pointer;
    &:hover {
      animation-play-state: paused;
    }
    &::before {
      content: "";
      left: 0;
      top: 0;
      height: 100%;
      width: 100%;
      box-shadow: 0 0 20px #fff inset;
      position: absolute;
      border-radius: 50%;
    }
    .light {
      border-radius: 50%;
      width: 75px;
      height: 54px;
      transform: rotate(140deg);
      top: -24px;
      position: absolute;
      left: -18px;
      display: block;
      background: radial-gradient(farthest-side, #fff, rgba(255, 255, 255, 0));
    }
    .light2 {
      width: 24px;
      height: 15px;
      position: absolute;
      bottom: 9px;
      right: 15px;
      transform: rotate(-25deg);
      border-radius: 50%;
      display: block;
      background: radial-gradient(farthest-side, #fff, rgba(255, 255, 255, 0));
    }
  }
</style>登录后复制
<span class="blister">
<span class="light"></span>
<span class="light2"></span>
</span>
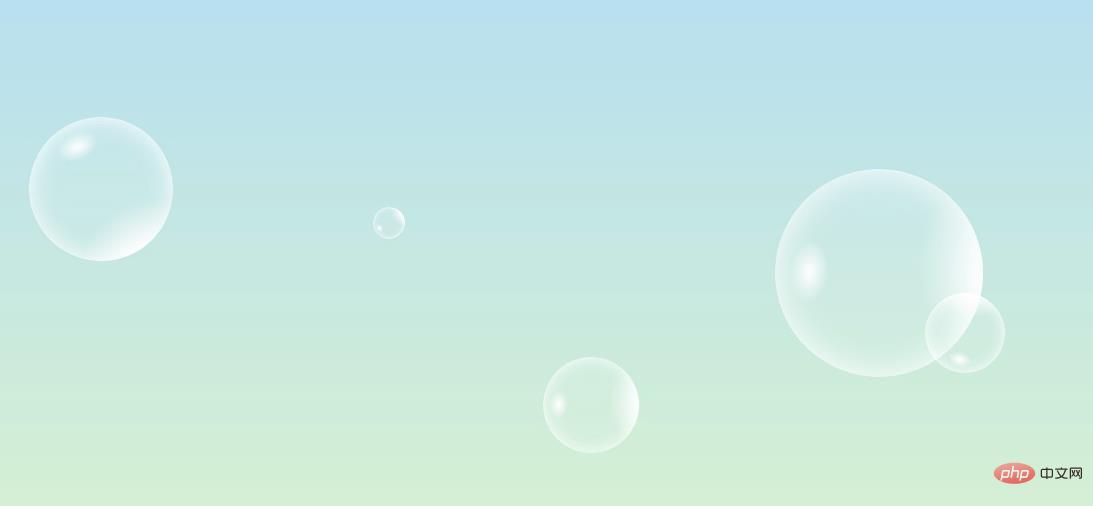
登录后复制如下图,可以做一个漂亮的气泡

然后再用上一篇文章的animation让他动起来。
看效果点这里 https://k-ui.cn 动画延迟,要等会才能呈现。
推荐学习:CSS3视频教程
以上就是教你怎么使用css3给图片添加渐变效果(代码详解)的详细内容,更多请关注zzsucai.com其它相关文章!
