所属分类:web前端开发

前端(vue)入门到精通课程:进入学习
Apipost = Postman + Swagger + Mock + Jmeter 超好用的API调试工具:点击使用
最近一直都在使用 Angular 进行开发,维护项目。遇到了日期的问题,同事采用的是 @danielmoncada/angular-datetime-picker。
PS:当然,如果是新项目,还是建议使用框架集成的日期功能,虽然功能可能不是你的预期,但是起码够用。比如
ant design的angular版本。
当然,angular-datetime-picker 提供了很多属性和事件。【相关教程推荐:《angularjs视频教程》】
比如:
owl-date-time 的属性有:
| 属性名称 | 类型 | 是否必要 | 默认值 |
|---|---|---|---|
| pickerType | both, calendar, timer | 可选 | both |
| yearOnly | 布尔值 | 可选 | false |
其他的属性和方法请前往官网查看
当然,本文我们并不是探讨这些简单更改属性和方法的需求。我们来讨论两点:
在输入框中显示 YYYY/MM/ HH:mm:ss 格式
翻译 - 更改按钮的名称 Cancel => 取消,Set => 设置
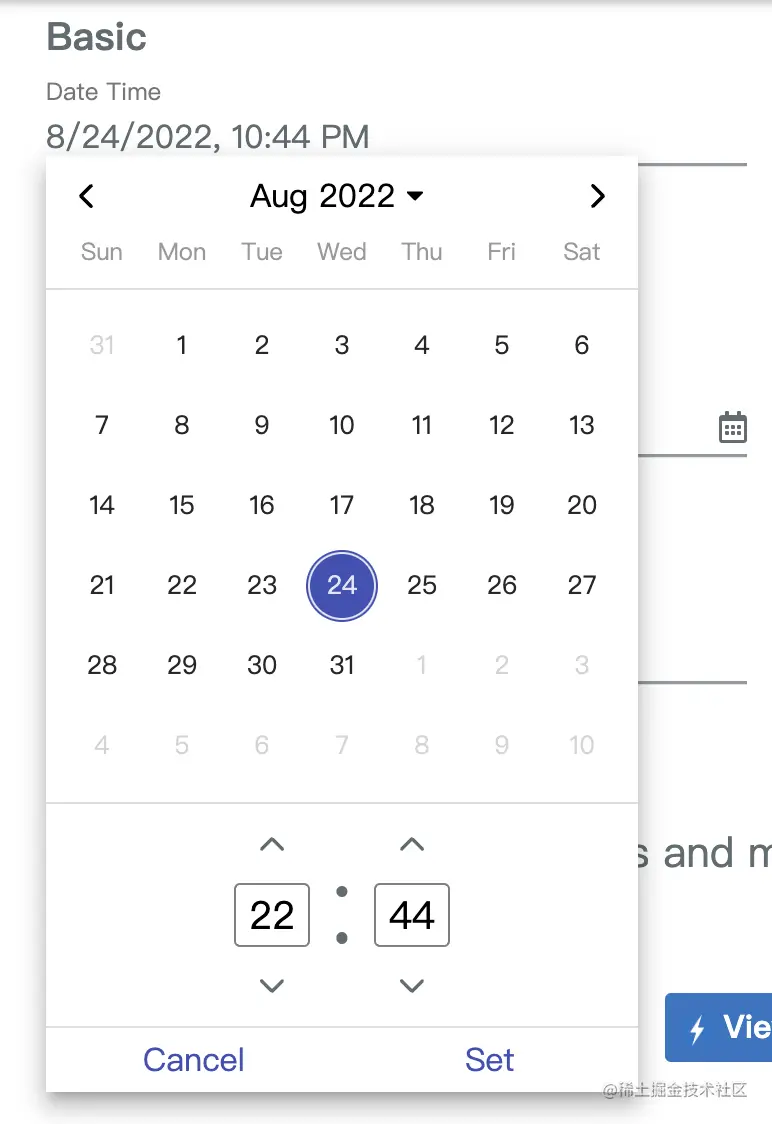
目前默认的值是这样的:

我们有相关的 html 代码如下:
<ng-container>
  <input
    element-id="date-time-picker"
    class="form-control"
    (ngModelChange)="goToDate($event)"
    [min]="minDate" [max]="maxDate"
    [owlDateTimeTrigger]="dt"
    [(ngModel)]="selectedMoment"
    [owlDateTime]="dt">
  <owl-date-time #dt [showSecondsTimer]="true"></owl-date-time>
</ng-container>登录后复制在 app.module.ts 中引入:
import {OwlDateTimeModule, OwlMomentDateTimeModule, OWL_DATE_TIME_FORMATS} from '@danielmoncada/angular-datetime-picker';

// https://danielykpan.github.io/date-time-picker/#locale-formats
// 自定义格式化时间
export const MY_MOMENT_FORMATS = {
    fullPickerInput: 'YYYY/MM/DD HH:mm:ss', // 指定的时间格式
    datePickerInput: 'YYYY/MM/DD',
    timePickerInput: 'HH:mm:ss',
    monthYearLabel: 'YYYY/MM',
    dateA11yLabel: 'YYYY/MM/DD',
    monthYearA11yLabel: 'YYYY/MM',
};

@NgModule({
  imports: [
    OwlDateTimeModule,
    OwlMomentDateTimeModule
  ],
  providers: [
    {provide: OWL_DATE_TIME_FORMATS, useValue: MY_MOMENT_FORMATS
  ],
})

export class AppModule {
}登录后复制
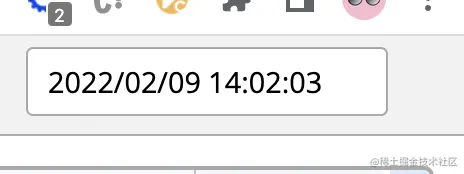
得到的结果图如下:

我们需要用到这个包的国际化,将对应的 Cancel 翻译成 取消,Set 翻译成 设置。
官网已经介绍:
import { NgModule } from '@angular/core';
import { OwlDateTimeModule, OwlNativeDateTimeModule, OwlDateTimeIntl} from 'ng-pick-datetime';
// here is the default text string
export class DefaultIntl extends OwlDateTimeIntl = {
  /** A label for the up second button (used by screen readers). */
  upSecondLabel= 'Add a second',
  /** A label for the down second button (used by screen readers). */
  downSecondLabel= 'Minus a second',
  /** A label for the up minute button (used by screen readers). */
  upMinuteLabel= 'Add a minute',
  /** A label for the down minute button (used by screen readers). */
  downMinuteLabel= 'Minus a minute',
  /** A label for the up hour button (used by screen readers). */
  upHourLabel= 'Add a hour',
  /** A label for the down hour button (used by screen readers). */
  downHourLabel= 'Minus a hour',
  /** A label for the previous month button (used by screen readers). */
  prevMonthLabel= 'Previous month',
  /** A label for the next month button (used by screen readers). */
  nextMonthLabel= 'Next month',
  /** A label for the previous year button (used by screen readers). */
  prevYearLabel= 'Previous year',
  /** A label for the next year button (used by screen readers). */
  nextYearLabel= 'Next year',
  /** A label for the previous multi-year button (used by screen readers). */
  prevMultiYearLabel= 'Previous 21 years',
  /** A label for the next multi-year button (used by screen readers). */
  nextMultiYearLabel= 'Next 21 years',
  /** A label for the 'switch to month view' button (used by screen readers). */
  switchToMonthViewLabel= 'Change to month view',
  /** A label for the 'switch to year view' button (used by screen readers). */
  switchToMultiYearViewLabel= 'Choose month and year',
  /** A label for the cancel button */
  cancelBtnLabel= 'Cancel',
  /** A label for the set button */
  setBtnLabel= 'Set',
  /** A label for the range 'from' in picker info */
  rangeFromLabel= 'From',
  /** A label for the range 'to' in picker info */
  rangeToLabel= 'To',
  /** A label for the hour12 button (AM) */
  hour12AMLabel= 'AM',
  /** A label for the hour12 button (PM) */
  hour12PMLabel= 'PM',
};

@NgModule({
 imports: [
   OwlDateTimeModule,
   OwlNativeDateTimeModule
 ],
 providers: [
   {provide: OwlDateTimeIntl, useClass: DefaultIntl},
 ],
})

export class AppExampleModule { }登录后复制
我们按照上面的思路整合下来实现我们的需求:
新建翻译文件 owl-date-time-translator.ts
import { Injectable } from '@angular/core';
import { DefaultTranslationService } from '@services/translation.service';
import { OwlDateTimeIntl } from '@danielmoncada/angular-datetime-picker';

@Injectable()
export class OwlDateTimeTranslator extends OwlDateTimeIntl {

  constructor(protected translationService: DefaultTranslationService) {
    super();

    /** 取消按钮 */
    this.cancelBtnLabel = this.translationService.translate('action.cancel');

    /** 设置按钮 */
    this.setBtnLabel = this.translationService.translate('action.set');
  }

};登录后复制
这里我们引入了翻译服务 translationService,可以根据不同地区进行语言选择。
然后我们在 app.module.ts 上操作:
import { OwlDateTimeIntl } from '@danielmoncada/angular-datetime-picker';

// 翻译 @danielmoncada/angular-datetime-picker
import { OwlDateTimeTranslator } from './path/to/owl-date-time-translator';

@NgModule({
  providers: [
    {provide: OwlDateTimeIntl, useClass: OwlDateTimeTranslator},
  ],
})

export class AppModule {
}登录后复制
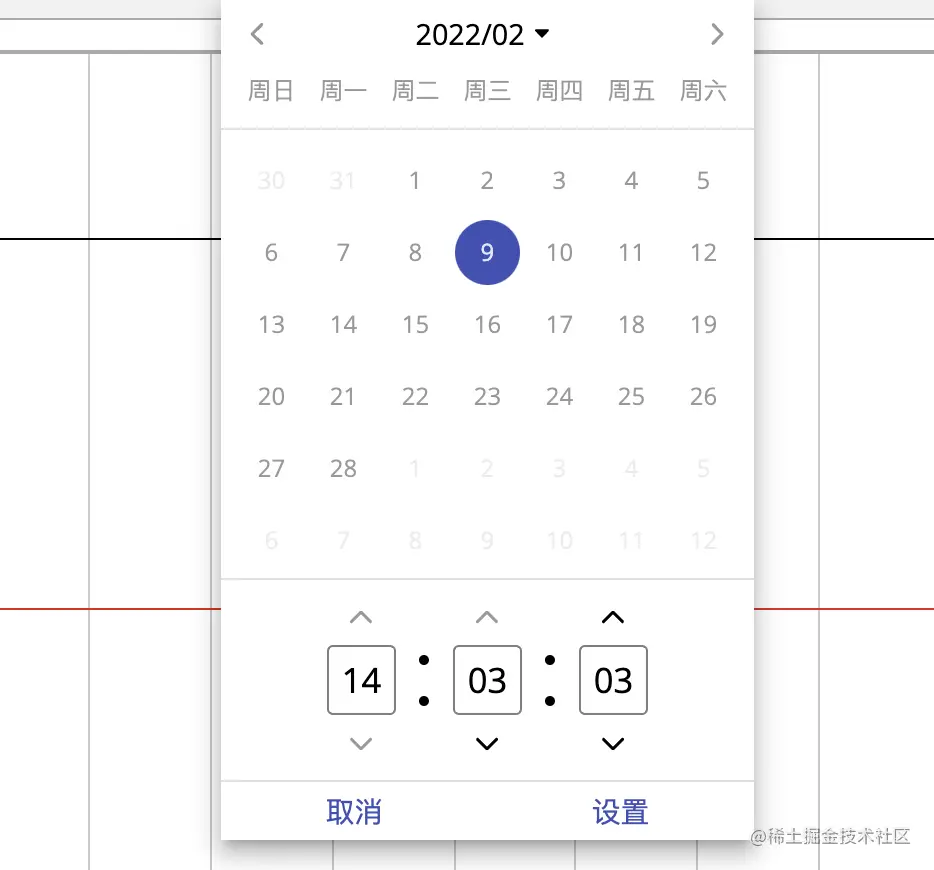
得到的效果图如下:

更多编程相关知识,请访问:编程视频!!
以上就是聊聊自定义angular-datetime-picker格式的方法的详细内容,更多请关注zzsucai.com其它相关文章!
